
Introduction
In this guide, you will learn how to get started with pytest. Before we start you should be already familiar with unitary tests and why they are important. The goal of this article is to show you how to set up pytest and why should you use it.
Now, let’s begin. Unit tests are pieces of code that allows you to test the smallest parts of your application like modules, classes, components, etc.
They must be concise and test one thing at the time, that’s why their name is unit tests. There are several frameworks that will help you write unit tests effortless. For Python, the most popular is pytest according to Slant.
Before getting started
For this tutorial I will assume you know the following, also I’ll be using Python 3.6.5:
- What is a CLI
- How to create a virtual environment
- Python basic syntax (Dictionary, arrays, etc)
- How to install packages
- How to create Python modules
If you are okay with that, let’s go before you get bored of me first!
Pytest basics
Here is a summary of what will be cover in this basics guide:
- Setup instructions
- Test discovery
- Configuration files
- Fixtures
- Asserts
- Markers
Setup instructions
- Create a folder for your project
- Create a virtual environment with python3
mkdir venv
python3 -m venv venv
source venv/bin/activate
- Install pytest
pip install pytest
- Create a Python module named example and Python file for your source code (Mine will be code.py)
That’s all the setup we will need for now. You should have a directory like this:
.
├── venv/
├── example
|   ├── __init__.py
|   └── code.py
├── tests
|   ├── __init__.py
|   └── test_code.py
Let’s run a hello world test, create a function to check if a number is even:
# example/code.pydef is_even(number):
	return number % 2 == 0
Now we create our first test with something like:
# tests/test_code.py
from example.code import is_evendef test_valid_even():
	assert is_even(2)
And we run our test with:
pytest tests/test_code.py
And success! Our output will be something like:
================================================================================= test session starts ==================================================================================platform darwin -- Python 3.6.5, pytest-4.1.1, py-1.7.0, pluggy-0.8.1rootdir: /Users/js/Code/pytest_example, inifile:collected 1 item                                                                                                                                                                       tests/test_code.py .                                                                                                                                                    [100%]
=============================================================================== 1 passed in 0.09 seconds ===============================================================================
Note: You will see a . (dot) when a test pass, if it fails you will see an F.
But guess what? You didn’t need to specify the file. If you run pytest in your terminal, you will get the same output thanks to pytest test discovery convention.
Test discovery
This is the file naming conventions `pytest` uses to find the tests. Here is an extract from the documentation:
pytest implements the following standard test discovery:
- If no arguments are specified then collection starts from testpaths (if configured) or the current directory. Alternatively, command line arguments can be used in any combination of directories, file names or node ids.
- Recurse into directories, unless they match norecursedirs.
- In those directories, search for test_*.py or *_test.py files, imported by their test package name.
- From those files, collect test items:
-test_ prefixed test functions or methods outside of class
-test_ prefixed test functions or methods inside Test prefixed test classes (without an __init__ method)
In summary, it means that by default pytest will find all files which match the regex test_*.py or *_test.py. Inside those files, it will collect all functions with the prefix test_ and then execute them.
The testpaths option allows you to change the root tests directory.
Configuration files
You can specify the initial configuration for pytest using a pytest.ini file. In it, you can choose the tests directories, name pattern, etc.
There are several files that you can use to setup pytest. This is an extract of the docs:
# first look for pytest.ini files
path/pytest.ini
path/setup.cfg  # must also contain [tool:pytest] section to match
path/tox.ini    # must also contain [pytest] section to match
pytest.ini
... # all the way down to the root

# now look for setup.py
path/setup.py
setup.py
... # all the way down to the root
It establishes which is the precedence of the configuration files. If your project has several of these files when you run pytestit will tell you which file is using.
================================================================================= test session starts ==================================================================================
platform darwin -- Python 3.6.5, pytest-4.1.1, py-1.7.0, pluggy-0.8.1
rootdir: /Users/js/Code/pytest_example, inifile: pytest.ini
collected 1 item
In this docs you can see all the options you can use on a configuration file.
So far you learned how to create a simple test, how test discovery works and how to customize pytest configuration with a setup file. Now let’s start with the main features of pytest!
Pytest features
In here we will cover enough to get you started writing real-world tests. This is the list of features we will cover:
- Asserts
- Fixtures
- Markers
Asserts
In pytest the asserts are simple and self-explanatory. You use the assert keyword with some expression that must be valid. Otherwise, the test will fail. Here is how it looks like when a test fails. (This is another extract from pytest docs):
=========================== test session starts ============================
platform linux -- Python 3.x.y, pytest-4.x.y, py-1.x.y, pluggy-0.x.y
rootdir: $REGENDOC_TMPDIR, inifile:
collected 1 itemtest_assert2.py F [100%]================================= FAILURES =================================
___________________________ test_set_comparison ____________________________ def test_set_comparison():
set1 = set("1308")
set2 = set("8035")
> assert set1 == set2
E AssertionError: assert {'0', '1', '3', '8'} == {'0', '3', '5', '8'}
E Extra items in the left set:
E '1'
E Extra items in the right set:
E '5'
E Use -v to get the full difftest_assert2.py:5: AssertionError
========================= 1 failed in 0.12 seconds =========================
It will tell you exactly what is failing in your expression. For more information about the assert keyword, check the docs here.
Fixtures
We finally got to the main feature of pytest. I had a hard time understanding pytest fixtures at the beginning. I felt like everybody was talking about how great they were and nobody was explaining what the hell they actually are.
Fixtures are an example of dependency injection (you can read it in pytest docs here). Their goal is to inject some calculated values/objects that can be reused on your tests. Here is an extract from pytest docs:
Fixtures: a prime example of dependency injection
Fixtures allow test functions to easily receive and work against specific pre-initialized application objects without having to care about import/setup/cleanup details. It’s a prime example of dependency injection where fixture functions take the role of the injector and test functions are the consumers of fixture objects.
Fixtures are functions decorated with the pytest decorator @pytest.fixture. By convention, all fixtures should be declared on the conftest.py file on the root directory of every Python module detected by pytest. Remember, pytest only detects modules according to the testpaths defined on your ini file.
Here is a conftest.py example:
# tests/conftest.py
import pytest@pytest.fixture
def even_number():
	return 2
Now we can change our old test with something like:
# tests/test_code.py
from example.code import is_evendef test_valid_even(even_number):
   assert is_even(even_number)
If you execute it again you will see the test passed. I hope you see the fixtures huge potential. You can create complex objects for particular tests and reuse them.
Pytest workflow looks something like this:
- Find and read a configuration file
- Identify all declared fixtures on conftest.py files and collect them
- Collect all tests that match the specified directories and pattern on the ini file
- Before executing each test, pytest will check the test arguments to see if it matches any collected fixture. If it does, it will execute the fixture and use the returned value as the parameter with the fixture name
- After all pytest executes all the fixtures and replaced their respective value, it will run the test.
Scopes
By default pytest executes all fixtures once per function. This can be expensive if, for example, you request data from an API. Each test with that fixture name as a parameter will make an API request, slowing down your tests. In summary, be aware of the following:
Every time an argument of any test matches the name of a collected fixture, pytest will execute the fixture and use the returned value as the parameter to the function. EVEN IF THE PARAMETER IS NOT USED.
For these situations, we have the scope parameter. This parameter allows us to reuse a fixture instance between tests. The possible values of the scope parameter are: function, class, module, package or session.
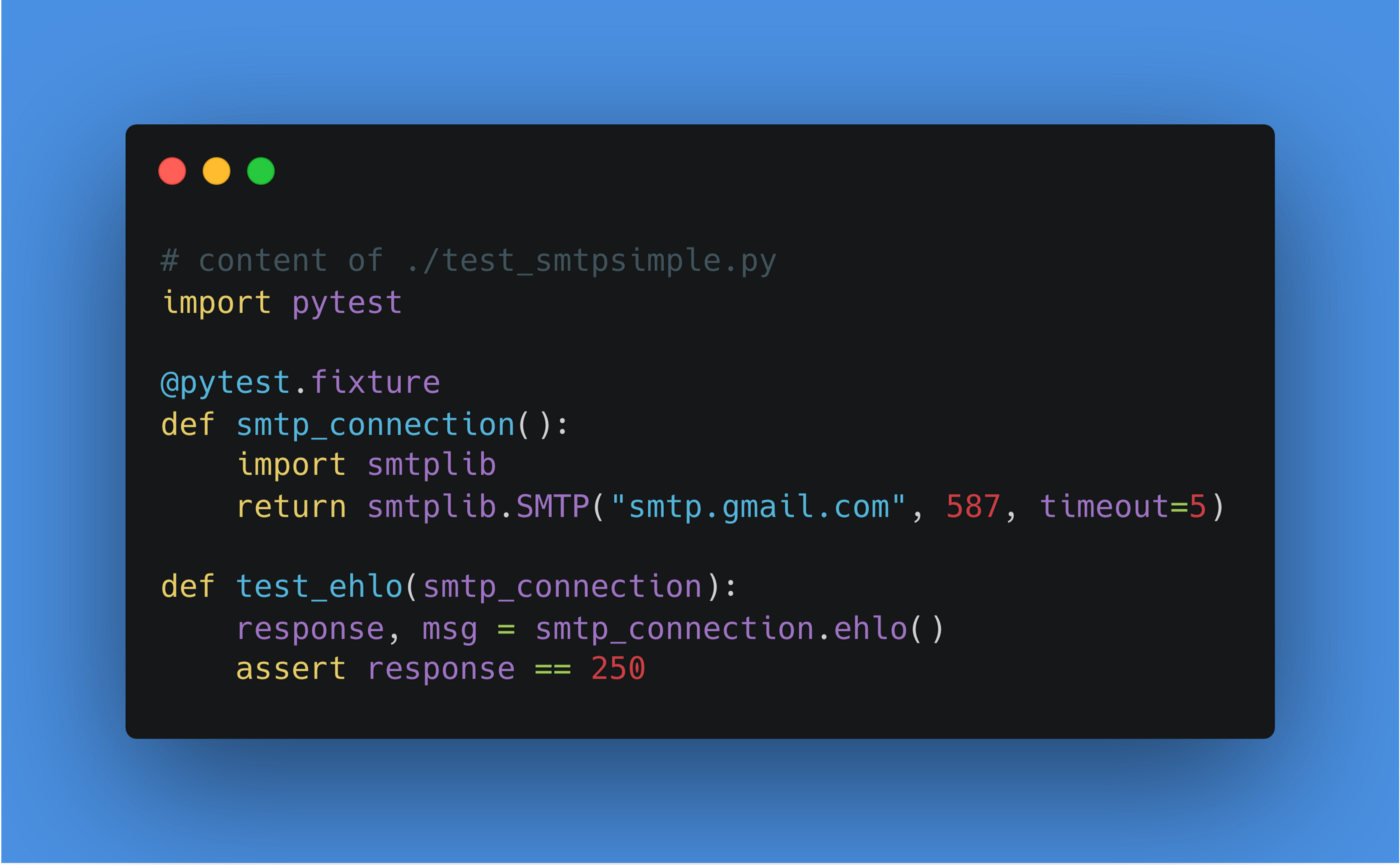
In the pytest docs there is a great example of an smtp connection object:
# content of conftest.py
import pytest
import smtplib@pytest.fixture(scope="module")
def smtp_connection():
   return smtplib.SMTP("smtp.gmail.com", 587, timeout=5)
In this example, we can reuse the smtp connection object between all the tests in the same Python module. Imagine we want to execute some code after the smtp_connection fixture's execution:
# content of conftest.pyimport smtplib
import pytest@pytest.fixture(scope="module")
def smtp_connection():
   smtp_connection = smtplib.SMTP("smtp.gmail.com", 587, timeout=5)
   yield smtp_connection  # provide the fixture value
   print("teardown smtp")
   smtp_connection.close()
Before we move to another pytest feature, I want to clarify that you can have several conftest.py files. You can have one conftest.py file per Python module detected by pytest, look at this example:
.
├── tests
│  ├── __init__.py
│  ├── test_example.py
│  ├── conftest.py
│  └── api
│     ├── __init__.py
│     ├── test_api.py
│        └── conftest.py
Notes: Tests defined in the test_example.py can use the fixtures defined in tests/conftest.py, but the test_api.py can use all fixtures from tests/conftest.py and tests/api/conftest.py.
Markers
Markers are a pytest decorator that allows you to classify your tests or perform some specific action.
To list all the markers you have defined execute:
pytest --markers
You will have an output with default markers, here you can see a summary of the most relevant ones:
@pytest.mark.filterwarnings(warning): add a warning filter to the given test...@pytest.mark.skip(reason=None): skip the given test function with an optional reason...@pytest.mark.xfail(condition, reason=None, run=True, raises=None, strict=False): mark the test function as an expected failure if eval(condition) has a True value...@pytest.mark.parametrize(argnames, argvalues): call a test function multiple times passing in different arguments in turn. argvalues generally needs to be a list of values if argnames specifies only one name or a list of tuples of values if argnames specifies multiple names.
The description is pretty much self-explanatory but let’s see some examples:
- @pytest.mark.skip(reason=None): With this marker pytest will skip the test, you can add a reason to explain why.
@pytest.mark.skip(reason='This test is no longer required')

  def test_valid_even(even_number):
      ...
Also, there is a variation from this marker to skip the test if a condition is True: @pytest.mark.skipif(condition)
- @pytest.mark.xfail(condition, reason=None, run=True, raises=None, strict=False): With this, you can mark the test as Expected to fail if the condition parameter is True. This is useful if you write a test with a feature that hasn’t been implemented or when the functionality you were testing has changed and you know the test will fail.
@pytest.mark.xfail(reason='The is_even method functionality has changed')

  def test_valid_even(even_number):
      ...
- @pytest.mark.parametrize(argnames, argvalues): This marker will allow you to reuse a test with different parameters so you include more cases or situations as input for your test.
@pytest.mark.parametrize("number", [2, 4, 6, 8])

  def test_valid_even(number):
      assert is_even(number)
If you execute this, you will see that 4 tests pass because of each input count as an independent test
Here is a summary of the tests with markers and some distinct syntax you can use:
# tests/test_shopping_cart.pyimport pytestfrom cart.shopping_cart import is_even@pytest.mark.skip(reason='This test is no longer needed')def test_skip_example(even_number):
   assert is_even(even_number)@pytest.mark.xfail(reason='An even number plus 1 will never be even')
def test_xfail_example(even_number):
   assert is_even(even_number + 1)@pytest.mark.xfail(reason='This test will pass but its marked as expected to fail')def test_xpass_example(even_number):
   assert is_even(even_number)@pytest.mark.parametrize('even', [2, 4, 6, 8])
@pytest.mark.parametrize('not_even', [3, 5, 7, 9])
def test_parametrize_example1(even, not_even):
   assert is_even(even)
   assert not is_even(not_even)@pytest.mark.parametrize('even, not_even', [(2, 3), (4, 5), (6, 7)])def test_parametrize_example2(even, not_even):
   assert is_even(even)
   assert not is_even(not_even)# You can mark an individual test instance as expected to fail@pytest.mark.parametrize('even, not_even', [(2, 3), pytest.param(5, 5, marks=pytest.mark.xfail)])def test_parametrize_example3(even, not_even):
   assert is_even(even)
   assert not is_even(not_even)
If you run all these tests, the output would be like:
================================================================================= test session starts ==================================================================================platform darwin -- Python 3.6.5, pytest-4.1.1, py-1.7.0, pluggy-0.8.1rootdir: /Users/js/Code/pytest_example, inifile:collected 24 items tests/test_shopping_cart.py sxX....................x [100%]============================================================== 20 passed, 1 skipped, 2 xfailed, 1 xpassed in 0.14 seconds ==============================================================
Notes:
- All expected to fail tests that actually fail will show a lowercase x. In the other hand, if the test has the xfail marker but it passes, it will count as Unexpected passes. In the result, they will appear with an uppercase X.
- pytest marks the skipped test with an s.
- If you use the parametrize marker, pytest will run an independent test for each combination of parameters. You can mark a specific instance as Expected to fail.
- If you want to see the reason for each marked test, you can add the -r flag, this is the description from the CLI help:
show extra test summary info as specified by chars (f)ailed, (E)error, (s)skipped, (x)failed, (X)passed, (p)passed, (P)passed with output, (a)all except pP. Warnings are displayed at all times except when --disable-warnings is set
- For example, you can use this to get the extra summary for all cases:
pytest -ra
Some final tips
If you have a lot of tests and need some kind of report, I would recommend you to try the Python package pytest-html. You can use it with the following command:
pytest --html=report.html
You will get something like:

It can be useful if you have tons of tests. Also, if you use PyCharm as your code editor, use pytest scripts instead of Python scripts. The whole UI is completely different and you can see the results categorized per module and test.
Be aware of using fixtures which value isn’t actually used. Because they will be dead time, making your tests slower.
If you can, avoid making calls to external API, this is another huge factor that can make your tests REALLY slow. Consider using Mocking. I didn’t cover it on this guide, but it’s a good practice that helps you keep your test concise and small. Remember, is important to test one functionality at the time. Sometimes our units of code have a lot of logic within like a backend endpoint. For those cases try using several unit tests instead of a big one. Or consider using other types of tests like Integration Tests.
For a small introduction to Mocking, check this great article.
I hope this article was useful to you. I tried to include all the small things about pytest that took me a while to understand. Now go and write some awesome unitary tests with pytest!
Original Article: https://medium.com/plusteam/pytest-beginners-guide-9fb9451706bf